Ultimate Guide:Walnut Floating Shelves – Styles,Sizes & Uses
Did you know that searches for floating shelves have surged by over 40% in the past three years?”
This growing trend is no coincidence: in a world where minimalism and smart space solutions are on the rise, walnut floating shelves have become an essential choice.
Picture a blank wall in your living room instantly transformed into an elegant display: your favorite books neatly stacked, a lush green plant adding life, and a few decorative pieces that showcase your personality.
Walnut floating shelves are more than just storage—they combine durability, timeless beauty, and natural warmth to elevate any room. In this ultimate guide, you’ll learn how to choose the right style, find the perfect size, and explore the many ways walnut floating shelves can refine and transform your home.
Key Takeaways
- Explore the different styles of walnut floating shelves to match your home decor.
- Learn about the various sizes available to fit your space.
- Discover the multiple uses of walnut floating shelves in home decor.
- Understand how to choose the perfect walnut floating shelves for your needs.
- Get tips on styling your walnut floating shelves with books and plants.
The Timeless Appeal of Walnut Wood in Home Decor
Walnut wood is a standout in home decor, known for its durability and style. Its rich, dark tones add sophistication to any room. This makes it a favorite among homeowners and designers.
Why Walnut Stands Out Among Hardwoods
Walnut wood is loved for its distinctive grain pattern and luxurious appearance. It combines strength with beauty, making it great for items like floating shelves.
Walnut wood is also very durable. It withstands wear and tear well. This means walnut floating shelves stay looking good for many years.
The Growing Popularity of Floating Shelves in Modern Design
Floating shelves are now a key part of modern home decor. They have a sleek, minimalist look that fits many decor styles, from contemporary to rustic.
Floating shelves are versatile. They’re perfect for showing off decorative items, storing books, or organizing kitchen tools. As modern design keeps changing, walnut floating shelves will likely become even more popular.
Understanding Walnut Floating Shelves: Characteristics and Benefits
Walnut floating shelves are known for their durability, beauty, and eco-friendliness. They are made from walnut wood, which is prized for its strength and unique look.
Durability and Strength Properties
Walnut wood is exceptionally durable and can withstand a lot of use. It’s strong enough to hold a lot of weight, making it perfect for shelves. Its density also helps prevent scratches and dents.
Distinctive Grain Patterns and Natural Color Variations
The distinctive grain patterns and natural colors of walnut wood make it stand out. Its rich, dark tones bring elegance to any room. This makes walnut shelves a favorite for adding style.
Sustainability Aspects of Walnut Wood
Walnut wood is a sustainable choice because it’s often from managed forests. Using walnut for shelves supports green woodworking practices.

| Wood Type | Durability | Aesthetic Appeal | Sustainability |
|---|---|---|---|
| Walnut | High | Unique Grain Patterns | Sustainable |
| Oak | High | Classic Look | Sustainable |
| Pine | Moderate | Light Color | Less Sustainable |
Exploring Different Styles of Walnut Floating Shelves
Walnut floating shelves come in many styles, from modern to rustic. They fit different tastes and decor needs. Homeowners can pick the perfect style for their home.
Modern and Minimalist Designs
Modern walnut shelves have clean lines and focus on function. They often look simple but are very stylish. Minimalist designs are great for keeping spaces tidy.
Rustic and Live Edge Options
Live edge walnut shelves have a natural, rustic charm. They keep the wood’s original edge, making them stand out. Rustic designs bring warmth and personality to any room.

Contemporary and Transitional Styles
Contemporary walnut shelves mix modern and traditional. Transitional styles are in between, fitting well with any decor. They’re perfect for adding walnut shelves to your current style.
| Style | Description | Best For |
|---|---|---|
| Modern | Clean lines, minimalist aesthetic | Clutter-free environments |
| Rustic | Live edge, natural beauty | Adding warmth and character |
| Contemporary | Blends modern and traditional elements | Versatile decor solutions |
The table shows walnut shelves come in many styles. Whether you want modern, rustic, or contemporary, there’s a shelf for you.
“The beauty of walnut wood lies in its rich, dark tones and unique grain patterns, making it a popular choice for homeowners seeking to add warmth and character to their spaces.”
Standard Sizes and Dimensions Guide
To plan your space with walnut floating shelves, knowing the typical sizes is key. These shelves come in various sizes to fit different rooms and styles. Choosing the right size is crucial for your needs.
Small Walnut Shelves: Measurements and Weight Capacity
Small walnut shelves are 24 to 36 inches long, 6 to 8 inches deep, and 1 to 2 inches thick. They’re great for small spaces or a few decorative items. They can hold 10 to 20 pounds, depending on the wall and installation.
Medium Walnut Shelves: Ideal Dimensions
Medium shelves are 48 to 60 inches long, 8 to 10 inches deep, and 2 inches thick. They’re versatile for living rooms and kitchens. They can hold 20 to 30 pounds, perfect for books or kitchenware.
Large Statement Shelves: Specifications
Large walnut shelves are 72 inches or more long, 10 to 12 inches deep, and 2 to 3 inches thick. They’re great for big spaces and can hold up to 50 pounds or more. They’re perfect for a room’s centerpiece or storing lots of items.
Here’s a quick reference table for the standard sizes and dimensions of walnut floating shelves:
| Size | Length (inches) | Depth (inches) | Thickness (inches) | Weight Capacity (pounds) |
|---|---|---|---|---|
| Small | 24-36 | 6-8 | 1-2 | 10-20 |
| Medium | 48-60 | 8-10 | 2 | 20-30 |
| Large | 72+ | 10-12 | 2-3 | 50+ |
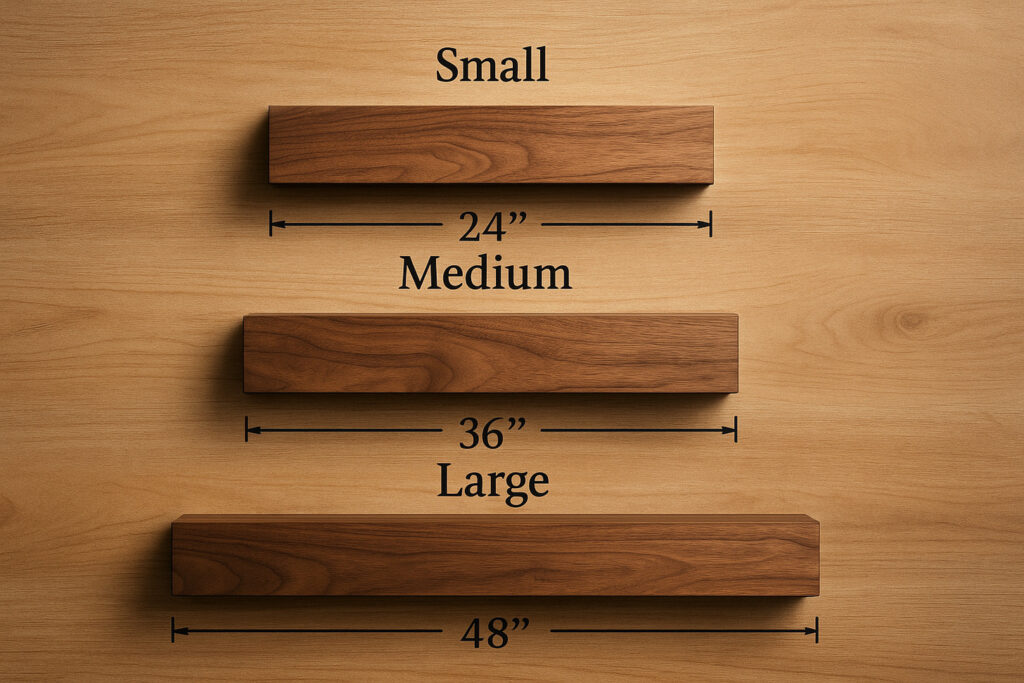
When picking walnut floating shelves, think about size and weight capacity. This ensures they fit your needs and are installed safely.
Custom Walnut Floating Shelves: What to Consider
Designing custom walnut floating shelves requires careful thought. You need to think about looks and function. This way, you can make shelves that fit your home perfectly.
Working with Custom Dimensions
When choosing custom dimensions, think about your wall space and what you’ll store. Measuring accurately is key for a perfect fit. You can also adjust the shelf thickness to hold different weights, from small decorations to heavy books.
Here’s a table with common dimensions to consider:
| Dimension | Consideration | Typical Measurement |
|---|---|---|
| Length | Wall space available | 30-60 inches |
| Depth | Space for items to be stored | 6-12 inches |
| Thickness | Weight capacity | 0.75-1.5 inches |
Special Finishes and Edge Treatments
Custom walnut shelves can get special finishes and edge treatments. Finishes like oil-based polyurethane or wax protect the wood and highlight its beauty. Edge treatments, like rounded or beveled edges, can add elegance or soften the shelves.

By thinking about these details, you can make custom walnut shelves that are both beautiful and useful. They will enhance your home.
Walnut vs. Other Wood Types: A Comprehensive Comparison
Choosing between walnut and other wood types depends on several factors. These include appearance, durability, and cost. Walnut is popular for furniture because of its rich color and fine grain. Yet, woods like oak, pine, maple, and cherry have unique qualities for different projects.

Walnut vs. Oak: Differences in Appearance and Durability
Walnut and oak are both strong hardwoods. But they look different. For a detailed comparison, see our article Walnut vs Oak floating shelves: which should you choose?. Walnut has a darker, richer color and finer grain. Oak is lighter with a more visible grain.
Both woods are durable, but walnut is denser. This makes walnut less likely to get scratched or dented.
Walnut vs. Pine: Price and Performance Considerations
Pine is a softwood that costs less than walnut. It’s softer and less durable, but good for budget-friendly projects. Pine might need extra treatments for durability.
Walnut, however, resists decay and insect damage better. It’s a better choice for projects lasting longer.
Comparing Walnut to Maple and Cherry
Maple and cherry are hardwoods with different looks and qualities than walnut. Maple has a light color and fine grain, perfect for a bright look. Cherry has a rich, reddish-brown color that deepens over time.
All three woods are durable. Walnut and cherry are often chosen for their luxury. Maple is valued for its versatility and wear resistance.
The choice between walnut and other woods depends on your project’s needs. Consider appearance, durability, and budget. Knowing each wood’s unique traits helps you make the best choice for your project.
Step-by-Step Installation Guide for Walnut Floating Shelves
To ensure a secure and level installation, follow this step-by-step guide for your walnut floating shelves. Proper installation is crucial for both the functionality and the aesthetic appeal of your shelves. For a complete tutorial, check out our DIY walnut floating shelves step-by-step guide.
Tools and Materials Needed
Before starting the installation, gather the necessary tools and materials. This includes essential hardware for secure mounting and recommended tools for DIY installation.
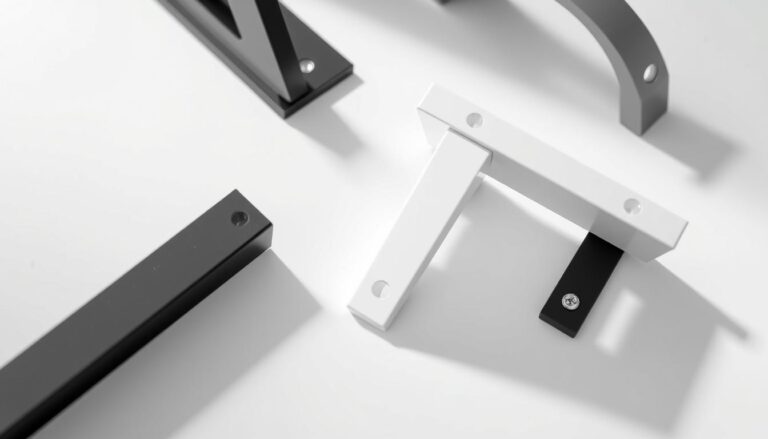
Essential Hardware for Secure Mounting
- Hidden brackets or cleats
- Wall anchors
- Screws and a drill
Recommended Tools for DIY Installation
- Stud finder
- Level
- Pencil and measuring tape
Preparing Your Wall: Finding Studs and Marking Positions
Locating the wall studs is a critical step in the installation process. Use a stud finder to identify the stud positions behind your drywall.
Using Stud Finders Effectively
Move the stud finder slowly across the wall until it indicates the presence of a stud. Mark the stud location with a pencil.
Creating Level Reference Lines
Use a level to draw a straight line along the wall where you plan to install your walnut floating shelves. This line will serve as a guide for mounting the brackets.

Installing Hidden Brackets or Cleats
Hidden brackets are essential for the secure mounting of your walnut floating shelves. Ensure they are properly aligned with the wall studs.
Securing Brackets to Wall Studs
Use screws to attach the brackets to the wall studs. Make sure they are level and evenly spaced.
Ensuring Proper Alignment
Double-check that the brackets are aligned with your reference line and are securely fastened to the wall studs.
Mounting Your Walnut Shelves Securely
Once the brackets are installed, you can mount your walnut floating shelves.
Testing Weight Capacity
Before loading your shelves with heavy items, test their weight capacity to ensure they are securely mounted.
Final Adjustments and Leveling
Make any necessary adjustments to ensure your shelves are perfectly level and securely attached. If you want a more detailed walkthrough, follow this step-by-step installation guide for walnut floating shelves.
| Installation Step | Tools Required | Notes |
|---|---|---|
| Locate Wall Studs | Stud Finder | Mark stud positions |
| Mount Hidden Brackets | Drill, Screws | Ensure alignment with studs |
| Install Shelves | Level | Test weight capacity |
Common Installation Mistakes to Avoid
To ensure a seamless installation, it’s crucial to avoid common mistakes. Installing walnut floating shelves can be a rewarding DIY project. But, it requires careful planning and execution.
Weight Distribution Errors
Ensuring proper weight distribution is key when installing floating shelves. Overloading can cause structural issues, potentially leading to collapse. It’s important to know the weight capacity of your shelves and distribute the weight evenly.
For example, placing heavy objects at the ends or unevenly can stress the brackets. This can cause problems.
| Shelf Length | Weight Capacity |
|---|---|
| 30 inches | 50 pounds |
| 40 inches | 70 pounds |
| 60 inches | 100 pounds |
Improper Bracket Installation
Another common mistake is the improper installation of brackets. Hidden brackets or cleats must be securely fastened to the wall studs. This supports the shelf and its contents.
Using the wrong type of bracket or failing to level the shelf can result in an unstable or crooked shelf. As
“A well-installed shelf is not just about aesthetics; it’s about creating a safe and functional space.”

By avoiding these common installation mistakes, homeowners can enjoy their walnut floating shelves for years. Proper installation not only enhances the beauty of the shelves. It also ensures their durability and functionality.
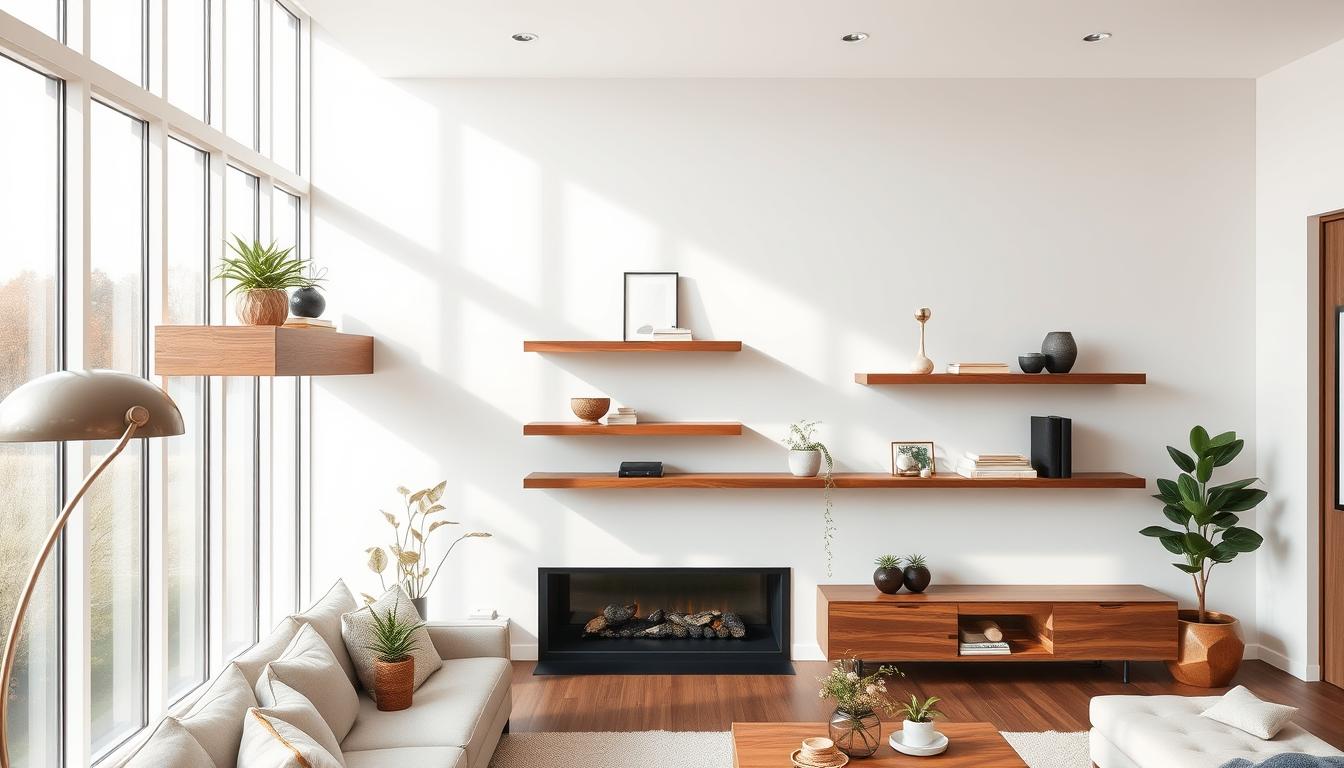
Walnut Floating Shelves in the Living Room
Walnut floating shelves add style and storage to any living room. They are not just useful but also make the room look better.

Styling Ideas for Books, Plants, and Decorative Objects
Styling walnut floating shelves is fun and full of options. You can show off your favorite books, add plants, or display decorative items like vases or sculptures. The goal is to make them both beautiful and useful.
To look good, group items in odd numbers and mix their heights and textures. This makes your shelves interesting and adds depth.
| Item | Description | Style Tip |
|---|---|---|
| Books | Display favorite novels or coffee table books | Stack horizontally and vertically for visual interest |
| Plants | Add greenery with potted plants or vases with branches | Choose plants with varying textures and heights |
| Decorative Objects | Showcase vases, sculptures, or framed photographs | Group items in odd numbers for a balanced look |
Creating a Focal Point with Strategic Placement
Where you place your walnut floating shelves matters a lot. To make a focal point, put shelves above a fireplace, behind a sofa, or near a window. This draws the eye and balances the room.
Also, using shelves to frame art or a mirror can make the room’s decor look better and more cohesive.
Kitchen Applications for Walnut Floating Shelves
Walnut floating shelves can make any kitchen look better and work better. They help keep things organized and make the space look nice.

Open Shelving for Dishes and Glassware
Walnut floating shelves are great for open shelving in kitchens. They let you show off dishes, glassware, and more in a neat way. Open shelving makes your kitchen look good and makes it easy to grab what you need.
Spice Storage and Pantry Organization
These shelves are also perfect for spice storage and keeping the pantry tidy. Place them near where you cook to have spices and ingredients right at hand. This keeps your kitchen clean and organized.
Combining Functionality and Style in Kitchen Design
To make walnut floating shelves work in your kitchen, mix function with style. Pick the right size and finish to match your kitchen. Combining functionality and style makes your kitchen both pretty and practical.
In short, walnut floating shelves are a big plus for kitchens. They help with open shelving, spice storage, and making the kitchen look good. By adding them thoughtfully, you can make your kitchen both useful and beautiful.
Bathroom Solutions Using Walnut Floating Shelves
Walnut floating shelves are becoming a hit in bathrooms for their looks and function. They can turn a bathroom into a spa by adding warmth and style.
Moisture Considerations for Bathroom Installations
When putting walnut floating shelves in bathrooms, think about the moisture. Walnut wood doesn’t like too much water, which can make it warp or change color. Make sure to seal the wood well and use a waterproof coat.
Good air flow in bathrooms is key for walnut shelves. It keeps the air stable. Also, clean the shelves often to avoid damage.
Organizing Toiletries and Towels Effectively
Walnut floating shelves are great for keeping toiletries and towels in order. Place them near sinks or bathtubs for easy access.
Use baskets or containers on the shelves for small items. This keeps things neat and makes the space look better.
Home Office and Workspace Applications
Creating an efficient home office involves strategic use of walnut floating shelves. These versatile storage solutions can help organize your workspace. They also add a touch of elegance to your office decor.
Creating Productive Environments with Strategic Shelving
Walnut floating shelves can make your home office more productive. They provide ample storage for books, files, and office supplies. By placing these shelves near your workspace, you can keep essential items within easy reach.
This minimizes distractions and maximizes efficiency. Consider installing shelves above your desk or along a wall. This creates a functional and stylish workspace.
Cable Management and Tech Integration
Effective cable management is crucial in a home office. It keeps your workspace clutter-free and organized. Walnut floating shelves can be used with cable management systems to keep cords and cables out of sight.
You can also integrate technology, such as wireless charging stations or smart storage solutions. This enhances the functionality of your shelves. It improves the aesthetic of your office and contributes to a more productive work environment.
Styling and Decorating Your Walnut Floating Shelves
Walnut floating shelves are perfect for showing off your style. To decorate them well, you need to understand balance and composition.
Balance and Composition Principles
To balance your shelves, spread out the visual weight. Mix items of different heights and textures. For example, a tall vase next to a small box looks great together.For more inspiration on how to style them, check out these stylish walnut floating shelf ideas.
- Use a mix of large and small items to create visual interest.
- Vary the texture of objects to add depth.
- Balance heavy-looking items with lighter ones.
Color Coordination with Walnut’s Rich Tones
The dark tones of walnut wood are perfect for many colors. Pick items that match the warm tones of the walnut for a cohesive look.
Tips for color coordination:
- Choose items with colors that are adjacent to each other on the color wheel.
- Use the walnut’s natural color as a starting point and build your color palette around it.
- Consider the 60-30-10 rule: 60% dominant color, 30% secondary color, and 10% accent color.
Seasonal Decoration Updates
Change up your walnut floating shelves with the seasons. In fall, try using pumpkins, gourds, or warm candles.
Maintenance and Care for Solid Walnut Floating Shelves
Keeping your walnut floating shelves in top shape is key. Regular care keeps the wood looking great and the shelves working well. It’s all about preserving their beauty and function over time.
To keep your shelves looking good, you need to know how to clean them right. Also, learn when and how to refinish them to keep them looking new.
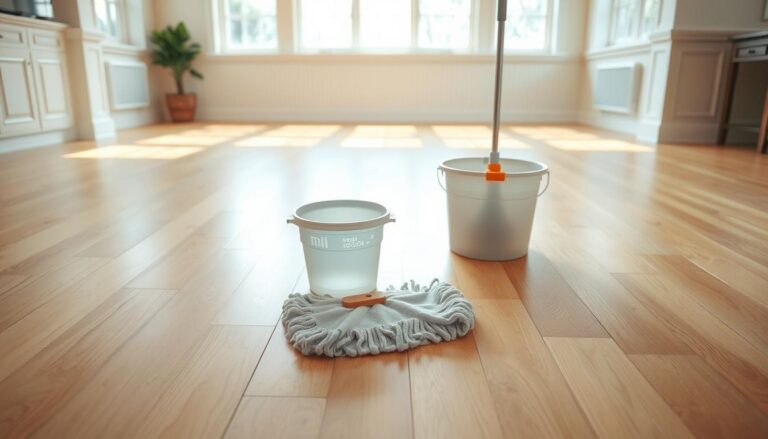
Cleaning Techniques for Walnut Wood
Cleaning walnut wood needs to be gentle. Dust regularly with a soft, dry cloth to stop dust from building up. For deeper cleaning, use a damp cloth with mild soap, wiping in the wood grain direction. Stay away from harsh chemicals and abrasive cleaners that can harm the wood or strip its finish.
Woodworking experts say, “a well-maintained walnut shelf can be a timeless piece of decor”. So, regular cleaning is a simple way to keep your shelves looking their best.
Refinishing and Restoring Aged Shelves
Walnut shelves can get worn out over time, showing scratches or fading. Refinishing can bring back their original shine. Begin by sanding the surface to fix imperfections, following the wood grain. Use a wood finish that matches the original as closely as possible. For serious damage, it’s best to get a professional’s help.
“Refinishing walnut shelves not only revives their appearance but also extends their lifespan,” says a seasoned furniture restorer.
By following these care tips, your walnut floating shelves will last for many years. They’ll stay luxurious and durable, keeping your space looking great.
Where to Buy Quality Walnut Floating Shelves
Quality walnut floating shelves are available online and from custom woodworkers. It’s key to look at both style and craftsmanship when choosing.
Top Online Retailers and Custom Woodworkers
Wayfair, Amazon, and West Elm have a wide selection of walnut floating shelves. You can also explore our guide to the best places to buy walnut floating shelves online for more options. You can also explore our guide to the 7 best walnut floating shelves for stylish home décor to compare top picks. They come in different styles and sizes. For something unique, consider custom woodworkers.
Custom woodworkers can be found on Etsy or through local listings. Make sure to check their portfolio and read reviews to ensure quality.
Price Ranges and What Determines Cost
The price of walnut floating shelves changes based on size, material, and craftsmanship. Basic shelves start at $50-$100. Custom or larger pieces can cost $200 to $500 or more. To compare top-rated picks, explore our Amazon walnut floating shelves buying guide.
Knowing these factors helps buyers make better choices. Whether buying online or from a custom woodworker, it’s important to understand the costs.
Conclusion: Elevating Your Space with Walnut Floating Shelves
Walnut floating shelves are a great way to make any room look better. They come in many styles, sizes, and finishes. This makes them perfect for different decor and needs.
Adding walnut floating shelves to your living room, kitchen, bathroom, or office makes your space look better. The dark tones of walnut wood add warmth and style. The floating design gives a sleek, modern look.
To get the most out of your walnut shelves, follow the styling and installation tips in this guide. With the right care, your shelves will stay beautiful and useful for many years. They will truly enhance your space.