How to Install Walnut Floating Shelves: Step-by-Step Guide
How to Install Walnut Floating Shelves is easier than you might think. Ever wondered if a sleek, hidden shelf can hold your books and look like a design pro built it? This guide gives you a clear, room-friendly approach that blends function and style.
You’ll learn two proven hardware methods: rod-style brackets and an interlocking Hovr system. Both hide fasteners and create a clean wood edge that appears to hover on the wall.
Start by marking a level line and finding at least two studs. That simple step protects load capacity and keeps a long shelf steady. Use the right tools — a stud finder, long drill bit, level, and quality saw — so holes align and finishes stay blemish-free.
Safety matters: check for wiring and plumbing before drilling, confirm bracket straightness, and use pilot holes when needed. With careful prep you’ll get a repeatable, sturdy result that saves space and improves your home’s look.
Key Takeaways
- Choose rod-style or Hovr hardware for a concealed, modern finish.
- Locate at least two studs and mark a perfectly level reference line.
- Use the right tools: long drill bit, stud finder, level, and saw.
- Verify bracket alignment and drill straight rod holes for a snug fit.
- Always check for hidden electrical and plumbing before drilling.
- Finish the wood with light sanding and a matte top coat for durability.
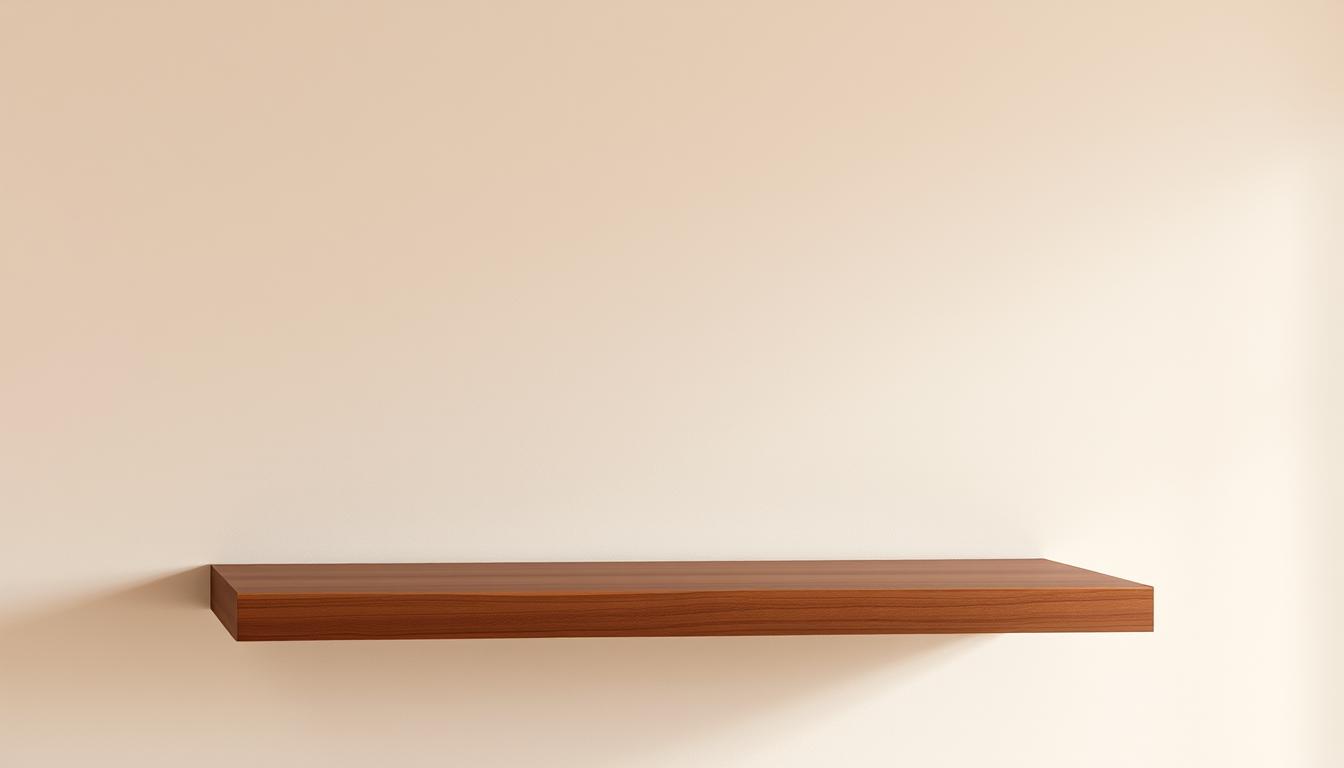
Why Choose Walnut Floating Shelves and What You’ll Achieve Today
Walnut boards bring strength and a warm tone that instantly lifts any room.
Durability and looks. Walnut is a top choice for a shelf because it resists warping and shows rich grain that fits modern or rustic look interiors. For a complete overview of walnut floating shelves styles, sizes, and uses, check out our Ultimate Guide to Walnut Floating Shelves.
With proper heavy-duty brackets, you can expect roughly 45–50 lbs per stud. Deeper shelves reduce capacity because of leverage, so plan length and depth for your intended use.
The result is a minimalist, no-visible-support presentation that still performs. You’ll pick bracket design and securement based on whether you want a removable set-screw option or a firmer silicone floating shelf hold.
- Match shelf length to stud spacing and load goals.
- Choose depth for display, books, or media without overloading weight floating shelf limits.
- Finish with a matte coat for easy maintenance and preserved wood character.
Tools, Hardware, and Materials You’ll Need for a Professional Install
The right gear and materials keep the job tidy and predictable.
Core tools: a reliable drill, an extra-long drill bit sized for your rods, a trusted stud finder, and a 24–48″ level. Add a miter saw for clean cuts and sandpaper for final smoothing.
Bracket choices: Pick a rod-style hidden shelf bracket for simple loads, a heavy-duty back bar with multiple rods for longer or deeper shelf spans, or a Hovr male/female system if you want fast engagement and set-screw locking. Inspect each bracket on arrival for straightness and weld quality. You can also explore our best walnut floating shelves on Amazon to find ready-to-buy options with reliable brackets.

- Match your drill bit to rod diameter (e.g., 1/2″ bit for 1/2″ rods) for a snug hole.
- Choose solid wood boards at least 1.25″ thick; select 1.75–2″ for chunkier builds and deeper use.
- Cut length about 1/16″ short for wall-to-wall runs and keep painters tape, a rubber mallet, and silicone handy.
“Many DIYers source extra-long bits and finishing supplies from Home Depot for one-trip convenience.”
| Item | Why it matters | Typical spec |
|---|---|---|
| Drill & bit | Creates straight, snug rod holes | Extra-long spade or brad-point matched to rod size |
| Shelf brackets | Carry load and control fit | 1/4″ steel back bar or Hovr kit with 3/16″ bit and #8 screws |
| Wood boards | Strength and appearance | Min 1.25″ thickness; 1.75–2″ for chunky shelves |
| Finish & consumables | Protects surface and eases fit | Clear matte top coat, sandpaper, painters tape |
Plan the Install: Studs, Layout, Safety, and Wall Conditions
Begin by mapping studs along the intended shelf line so your supports land solidly in wood.
Use a stud finder électronique and then verify with a small pilot hole where needed, especially on older plaster walls. Mark stud centers clearly so you can place bracket points over solid wood.
Draw a crisp level line for the top of your bracket and recheck level at several points. Transfer bracket wall hole locations by aligning the back bar and marking both vertical and horizontal centers for exact holes.
Make sure you scan for wiring and plumbing before any drilling. Start near an outlet or switch box when possible — these often sit on studs and reveal wiring paths.
- Plan depth and spacing for your items; books need roughly 10″ depth.
- For wall-to-wall runs, cut length about 1/16″ short and use painters tape when sliding the shelf in.
- Have shims ready for uneven walls and consider drilling new holes in the back bar so you can use every available stud.
- If you need bits or anchors, pick them up at Home Depot before you begin.

| Check | Why it matters | Quick action |
|---|---|---|
| Stud mapping | Hit solid wood for max strength | Use stud finder, verify with pilot hole |
| Level line | Keeps shelf flat across the wall | Mark at multiple points, recheck |
| Safety scan | Avoid wiring and pipes | Use detector and start near outlets |
| Clearance & length | Prevents scraping and fit issues | Cut 1/16″ short; protect edges with tape |
How to install walnut floating shelves
A straight bracket layout and snug rod holes make the difference between a tidy shelf and a sagging one.
Mount the bracket to studs
Place the bracket back against the wall along your level line and confirm the vertical screw holes face upward. Pre-drill the bracket wall holes and drive fasteners into every stud the back bar crosses.
Use thin wood shims behind the bracket where walls are uneven, then tighten so the back is flush and the bracket resists downward force.
Drill straight, snug rod bores
Mark rod locations on the board and clamp a square guide. Use an extra-long drill bit 1/2″ matched to the rods (1/2″ bit for 1/2″ rods) and drill straight to avoid oversized holes.

Seat, secure, and alternate engagement
Slide the shelf onto the rods, protect adjacent surfaces with painters tape, and use a rubber mallet for gentle taps. For a removable fit, use set screws; for a semi-permanent hold, add a small bead of silicone inside the bores.
For Hovr systems, pre-drill using the using included 3/16″ bit, fasten the male bracket with #8 2-1/2″ panhead screws, engage at a 15° angle, snap with light taps, and lock set screws.
Troubleshooting sag or tilt
If the shelf tilts, confirm the bracket wasn’t mounted upside down and that all studs were engaged. Add shims, tighten extra fasteners, or swap to heavy duty brackets for longer spans.
Finishing Walnut and Ensuring Strength: Coats, Capacity, and Durability
Finish work protects grain and gives your shelf a timeless, rustic look. Start with a clear matte top coat and avoid sanding the raw surface first. Let that first coat dry fully before any abrasion.
Finish for a smooth, rustic feel
Light hand-sanding with 150 grit between coats keeps the wood tone rich while smoothing the face and edges. Repeat coat, sand, coat until the surface wipes clean and resists fingerprints.

Weight basics and bracket choices
Plan capacity around studs and bracket design. Quality heavy duty hardware typically gives roughly 45–50 lbs per wall stud. Deeper shelves reduce capacity because leverage increases.
Styling and practical loading
- Use rods that reach most of the shelf depth to limit tipping forces.
- For book loads, pick 10–12″ depth and multiple stud connections.
- For media or small TVs, verify bracket rating and upgrade if projection is high.
“Set screws give serviceable floating shelf hold; silicone creates a semi-permanent bond.”
Check every connection annually: re-torque fasteners, wipe the surface, and inspect for any deflection. When in doubt, add blocking or engage more studs for long spans in busy home areas.
Conclusion
Finish strong with a quick checklist that keeps brackets true and load secure.
Verify studs first. Use a stud finder and confirm with a small pilot. Mount the floating shelf bracket into multiple studs and check the bracket back is flush before you tighten fasteners.
Match your drill bit to the rod size and drill straight holes for a snug fit. For Hovr systems, follow the using included bit and screws, engage at a slight angle, then lock set screws or add a bead of silicone for extra hold.
Pick heavy duty shelf brackets for long spans, stock long bits and screws at Home Depot, and recheck level after loading. With these steps, your shelf will look clean, bear daily use, and give your DIY construction lasting value. For inspiration on how to style them, discover 10 stylish walnut floating shelf ideas you’ll love.
FAQ
What tools and hardware should you gather before starting?
Gather a drill, an extra-long drill bit sized for the bracket rods, a stud finder, a level, a miter saw for cuts, sandpaper for edges, and the correct fasteners for wall studs or anchors. Include the specific shelf bracket system you purchased—rod-style, heavy-duty, or a Hovr-type set—and any set screws or silicone adhesive the manufacturer provides.
How do you find studs and verify their location?
Use a reliable stud finder to map studs across the wall, then verify by drilling small pilot holes in low-visibility spots. For plaster or older walls, probe gently or use a longer bit to confirm timber. Always check for electrical wires and plumbing before drilling with a wire detector or by visual inspection near outlets and switches.
What’s the correct way to mount the bracket to studs?
Align the bracket backplate with your level line and secure it directly into studs using heavy-duty lag screws. Maintain a top-down hole orientation when the bracket design calls for it, and use shims behind the plate if the wall is uneven. Tighten fasteners so the bracket sits flush and doesn’t wiggle under load.
How should you drill holes in the walnut shelf for the bracket rods?
Use the extra-long bit sized to match the bracket rods and drill straight, centered holes to the specified depth. Clamp the board to prevent movement, back the drill bit out periodically to clear chips, and test-fit on a scrap piece if unsure. A snug fit avoids wobble and reduces stress on set screws.
What’s the best technique for sliding the shelf onto the rods without damaging the finish?
Protect the shelf face with tape or a soft cloth, then slide it onto the rods while keeping the shelf level. Tap gently with a rubber mallet if needed. Avoid forcing the board; if it’s tight, verify hole alignment and use light sanding or re-drill slightly larger for a precise fit.
How do you secure the shelf once it’s on the bracket?
Many systems use small set screws that tighten into the rods from the bracket back or underside. For a semi-permanent hold, a bead of construction-grade silicone in the holes adds grip without visible hardware. Tighten set screws evenly to prevent tilt, and wipe excess adhesive immediately.
What if my shelf sags or isn’t level after mounting?
Check bracket alignment and that all fasteners hit studs. Loosen and re-level the bracket; add thin shims behind the backplate where gaps exist. For sag under load, consider adding more brackets or switching to heavy-duty, wider rod systems that increase load capacity.
How much weight can a shelf hold safely?
Capacity depends on bracket type, how many studs you use, the shelf depth, and wood thickness. Standard rod brackets into two studs typically support light to medium loads like decor and books. For heavy loads—large books or electronics—use heavy-duty brackets, attach to at least two studs, and follow manufacturer weight ratings.
Should you use set screws or adhesive for long-term strength?
Use set screws for removable, adjustable shelves and silicone adhesive for a semi-permanent bond. Combining both gives extra security: set screws locate the shelf while a thin bead of clear silicone resists micro-movement and reduces creak over time.
How do you finish walnut for a rustic, durable look?
Lightly hand-sand the shelf, remove dust, then apply a matte or satin top coat suited for hardwood. Oil finishes or a wipe-on polyurethane preserve grain and resist wear. Apply multiple thin coats, sanding lightly between them for a smooth, durable surface.
Can you retrofit floating brackets into existing shelves or walls?
Yes, but verify the existing shelf thickness and material can accept long rods and set screws. For retrofit on drywall without stud access, use rated heavy-duty anchors or add a cleat or ledger board that spans studs. Avoid relying on hollow-wall anchors for heavy loads.
What are common bracket styles and when should you choose each?
Rod-style brackets work well for a clean, minimal look and medium loads. Heavy-duty rod systems or thicker-diameter rods suit large, deep shelves and heavy items. Hovr-style male/female brackets offer tight mechanical locks and easier alignment for high-end installs. Choose based on load, shelf depth, and aesthetic.
How do you space multiple shelves for style and function?
Plan spacing based on the tallest items you’ll display, leaving clearance for books, frames, and decor. Stagger shelves for a layered look or align edges for a streamlined wall run. Maintain consistent vertical spacing for visual rhythm and ensure stud locations support each bracket line.